Introduction
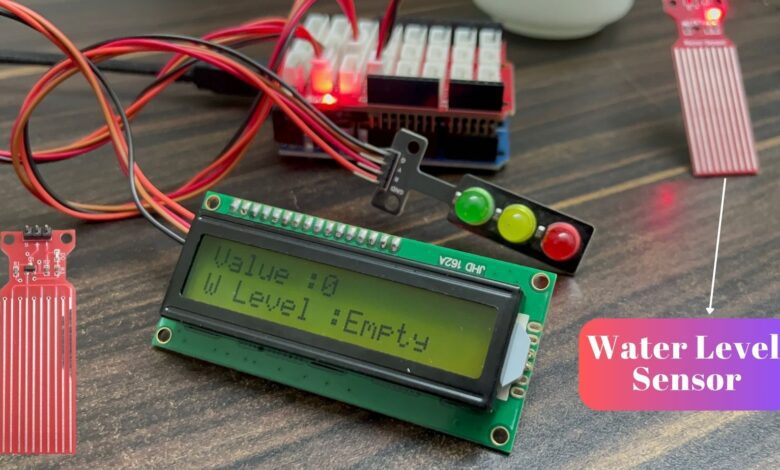
In this article, we design a simple water level monitoring system is measures the water level & displays it on a 16×2 LCD also shows the level in led through.
we can monitor factors such as water level, leaks and rainfall through this sensor.
Bill Of Material
S.N | Component | Quantity | Link To Buy |
1 | Arduino UNO | 1 | |
2 | Arduino UNO Shield | 1 | |
3 | 16x2 LCD Display (I2C) | 1 | |
4 | Water Level Sensor | 1 | |
5 | LED | 1 |
Component’s
Arduino UNO
- Arduino Is an open-source microcontroller board based on the ATmega328 chip.
- This Board has 14 digital input/output pins, 6 analog input pins, an Onboard 16 MHz ceramic resonator, a Port for USB connection, an Onboard DC power jack, An ICSP header and a microcontroller reset button.
- It contains everything needed to support the microcontroller.
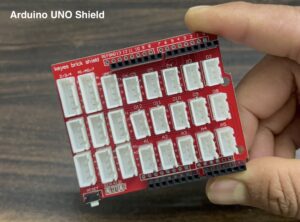
Arduino UNO Shield
In this shield, we directly interfaced the sensor and LCD or Other Devices.
16×2 LCD Display (I2C)
The LCD 16×2 Parallel LCD Display provides a simple and cost-effective solution for adding a 16×2 White Liquid Crystal Display to this project.
The display is conected to the I2C Protocol with an Arduino UNO Micro Controller Board.
Water Level Sensor
In this sensor, we can see 10 copper straps 5 of them are power straps and the other 5 are sensor straps. this sensor also works in the same way as the rain sensor and soil moisture sensor.
this water level sensor also acts as a variable resistor. the resistance varies according to the amount of water. the resistance value is inversely proportional to the height at which the sensor is submerged in water.
When the sensor is submerged in water, it has better conductivity and less resistance. Depending on the resistance value the analogue value will change.
Circuit Diagram
Code
|
1 2 3 4 5 6 7 8 9 10 11 12 13 14 15 16 17 18 19 20 21 22 23 24 25 26 27 28 29 30 31 32 33 34 35 36 37 38 39 40 41 42 43 44 45 46 47 48 49 50 |
//Prateek //www.justdoelectronics.com #include <LiquidCrystal_I2C.h> LiquidCrystal_I2C lcd(0x27, 16, 2); #define red 9 #define yellow 10 #define green 11 void setup() { Serial.begin(9600); lcd.init(); pinMode(red, OUTPUT); pinMode(yellow, OUTPUT); pinMode(green, OUTPUT); } void loop() { int value = analogRead(A1); lcd.setCursor(0, 0); lcd.print("Value :"); lcd.print(value); lcd.print(" "); Serial.println(value); lcd.setCursor(0, 1); lcd.print("W Level :"); if (value == 0) { lcd.print("Empty "); digitalWrite(red, LOW); digitalWrite(yellow, LOW); digitalWrite(green, LOW); } else if (value > 1 && value < 350) { lcd.print("LOW "); digitalWrite(red, LOW); digitalWrite(yellow, LOW); digitalWrite(green, HIGH); } else if (value > 350 && value < 510) { lcd.print("Medium"); digitalWrite(red, LOW); digitalWrite(yellow, HIGH); digitalWrite(green, LOW); } else if (value > 510) { lcd.print("HIGH "); digitalWrite(red, HIGH); digitalWrite(yellow, LOW); digitalWrite(green, LOW); } } |
Project Explanation
- Now we turn on the Arduino Uno board with a USB Cable and the LCD welcome message.
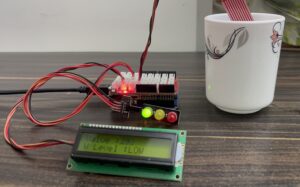
- Now The water level sensor displays less water level than is green LED will on and the LCD water level is LOW.
- This time water level sensor we deep in the water then the yellow LED will on and display the water level as Medium.
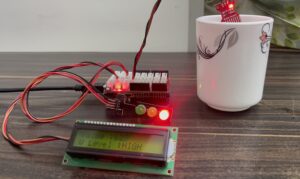
- when the water level sensor is put in deep water the RED LED will glow and display the water level HIGH on the LCD Display.
This project is used in various field water level measuring systems, rain alert systems and soil moisture level monitoring systems.
Video
More Arduino Projects


