Introduction
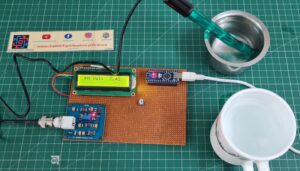
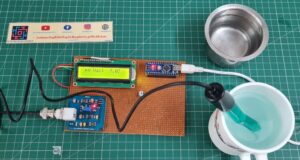
In this article, we interfaced the pH sensor with Arduino and displayed the pH sensor reading in a serial monitor and 16×2 LCD display. the pH sensor is analog sensor is voltage range is 4.2v to 5v. We will calibrate and see if it’s working in different liquids.
What is Ph?
The term PH is a quantitative measure of the acidity, and basicity of aqueous other liquid solutions. The term, widely used in chemistry, biology, and agronomy, translates the values of the concentration of the hydrogen ion which ordinarily ranges between about 1 and 10−14 gram-equivalents per litre—into numbers between 0 and 14.
Working Principle of pH Sensor
The basic principle behind pH sensing involves the use of a glass electrode or combination electrode that generates a voltage proportional to the hydrogen ion concentration in the solution being tested.
The glass electrode consists of a thin, pH-sensitive glass membrane that selectively interacts with hydrogen ions.
When the glass electrode comes into contact with a solution, an electrochemical reaction occurs between the hydrogen ions in the solution and the glass membrane, generating a voltage that is measured by a reference electrode. The resulting voltage is then converted into a pH value using a pH monitor.
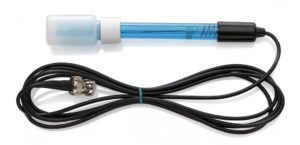
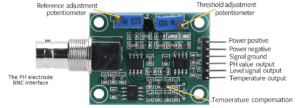
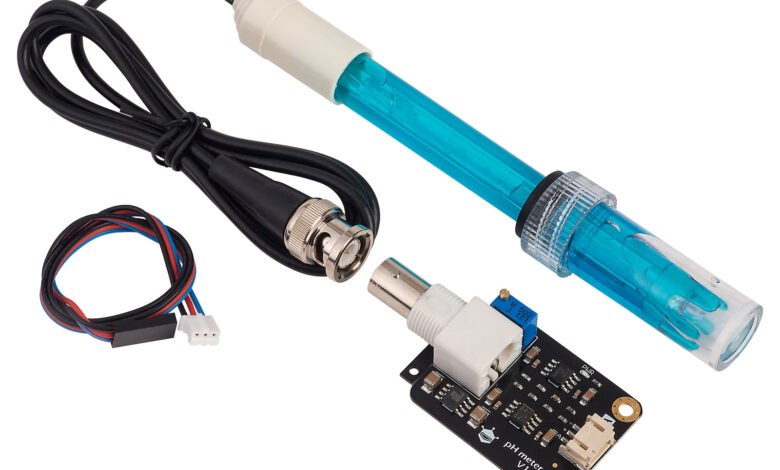
- pH Sensor Kit is specially designed for Controllers and has a built-in simple, convenient, and practical connection and features.
- It has an LED that works as the Power Indicator, a BNC connector, and a PH2.0 sensor interface. To use it, just connect the pH sensor with the BND connector, and plug the PH2.0 interface into the analog input port of any Controller.
Specifications
- Input Supply voltage:- (VDC) 5
- Module Size:- (mm) 50 x 47 x 16
- Measuring Range:- 0 to 14
- PH Measuring Temperature:- 0 to 50
- Accuracy:- 0.01 pH
- Response Time:- 1min
- Cable Length:- (cm) 75
- pH sensor size:- (mm) 150, 12
Advantages of the pH Sensor
- Accurate pH Measurement
- Wide Range of Measurement
- Real-Time Monitoring
- Non-Destructive Measurement
- Easy to Use
- Longevity and Durability
A disadvantage of the pH Sensor
- Ragility
- Maintenance and Calibration is not easy
- Response Time is slow
- Sensitivity to Temperature
Application of the pH Sensor
- Water Quality Monitoring
- Food and Beverage Industry
- Pharmaceutical Manufacturing
- Chemical Processes
- Environmental Monitoring
Example with Arduino
- Arduino and the LCD display Interfacing
- VCC of the LCD to +5V on Arduino
- GND of the LCD to GND on Arduino
- RS (Register Select) pin of the LCD to digital pin D2 on Arduino
- Enable (E) pin of the LCD to digital pin D3 on Arduino
- D4-D7 pins of the LCD to digital pins 5-8 on Arduino
- Connect the pH sensor module to the Arduino
- VCC of the pH sensor to +5V on Arduino
- GND of the pH sensor to GND on Arduino
- Analog output of the pH sensor to analog pin A0 on Arduino
Circuit Diagram with Arduino
Code with 16×2 LCD Display
|
1 2 3 4 5 6 7 8 9 10 11 12 13 14 15 16 17 18 19 20 21 22 23 24 25 26 27 28 29 30 31 32 33 34 35 36 37 38 39 40 41 42 43 44 45 46 47 48 49 50 51 52 53 54 55 56 57 58 59 60 61 62 63 |
#include <LiquidCrystal.h> LiquidCrystal lcd(2, 3, 4, 5, 6, 7); #define SensorPin A0 float calibration_value = 21.34 + 0.7; unsigned long int avgValue; int buf[10], temp; void setup() { pinMode(SensorPin, INPUT); lcd.begin(16, 2); lcd.clear(); lcd.setCursor(0, 0); lcd.print("Welcome To"); lcd.setCursor(0, 1); lcd.print(" pH Meter"); delay(2000); lcd.clear(); } void loop() { for (int i = 0; i < 10; i++) { buf[i] = analogRead(SensorPin); delay(10); } for (int i = 0; i < 9; i++) { for (int j = i + 1; j < 10; j++) { if (buf[i] > buf[j]) { temp = buf[i]; buf[i] = buf[j]; buf[j] = temp; } } } avgValue = 0; for (int i = 2; i < 8; i++) avgValue += buf[i]; float phValue = (float)avgValue * 5.0 / 1024 / 6; phValue = -5.70 * phValue + calibration_value; lcd.setCursor(0, 0); lcd.print(" pH Value: "); lcd.print(phValue); lcd.print(" "); lcd.setCursor(1, 1); if (phValue < 4) lcd.print(" Very Acidic "); else if (phValue >= 4 && phValue < 5) lcd.print(" Acidic "); else if (phValue >= 5 && phValue < 7) lcd.print(" Acidic-ish "); else if (phValue >= 7 && phValue < 8) lcd.print(" Neutral "); else if (phValue >= 8 && phValue < 10) lcd.print("Alkaline-ish "); else if (phValue >= 10 && phValue < 11) lcd.print(" Alkaline "); else if (phValue >= 11) lcd.print("Very alkaline"); delay(1000); } |
Code Explaination
- The
LiquidCrystalthe library is included, and anlcdthe object is created with the appropriate pin connections for the LCD display (pins 2, 3, 4, 5, 6, and 7). SensorPinis defined asA0, representing the analog pin connected to the pH sensor.- In the
setup()functionSensorPinis set as an input pin.- The LCD display is initialized with a 16×2 configuration.
- In the
loop()function- The average value is converted to a pH value using the provided formula and the calibration offset.
- pH value is displayed on the first line of the LCD.
- pH value is compared to specific pH ranges, and a corresponding message is displayed on the second line of the LCD.
Circuit Diagram with Arduino and OLED
Code
|
1 2 3 4 5 6 7 8 9 10 11 12 13 14 15 16 17 18 19 20 21 22 23 24 25 26 27 28 29 30 31 32 33 34 35 36 37 38 39 40 41 42 43 44 45 46 47 48 49 50 51 52 53 54 55 56 57 58 59 60 61 62 63 64 65 66 67 68 69 70 71 72 73 74 |
#include <Wire.h> #include <Adafruit_GFX.h> #include <Adafruit_SSD1306.h> #define SensorPin 0 unsigned long int avgValue; float b; int buf[10], temp; #define SCREEN_WIDTH 128 #define SCREEN_HEIGHT 64 #define OLED_RESET -1 Adafruit_SSD1306 display(SCREEN_WIDTH, SCREEN_HEIGHT, &Wire, OLED_RESET); void setup() { pinMode(13, OUTPUT); Serial.begin(9600); Serial.println("Ready"); if (!display.begin(SSD1306_SWITCHCAPVCC, 0x3C)) { Serial.println(F("SSD1306 allocation failed")); for (;;) ; } display.display(); delay(2); display.clearDisplay(); display.clearDisplay(); display.setTextColor(WHITE); display.setTextSize(2); display.setCursor(0, 5); display.print("PH Sensor"); display.display(); delay(3000); } void loop() { for (int i = 0; i < 10; i++) { buf[i] = analogRead(SensorPin); delay(10); } for (int i = 0; i < 9; i++) { for (int j = i + 1; j < 10; j++) { if (buf[i] > buf[j]) { temp = buf[i]; buf[i] = buf[j]; buf[j] = temp; } } } avgValue = 0; for (int i = 2; i < 8; i++) avgValue += buf[i]; float phValue = (float)avgValue * 5.0 / 1024 / 6; phValue = 3.5 * phValue; Serial.print(" pH:"); Serial.print(phValue, 2); Serial.println(" "); display.clearDisplay(); display.setTextSize(2); display.setCursor(20, 0); display.println("Ph Value"); display.setTextSize(3); display.setCursor(30, 30); display.print(phValue); display.display(); digitalWrite(13, HIGH); delay(800); digitalWrite(13, LOW); } |
Conclusion
pH sensors play a crucial role in measuring and monitoring pH levels in various applications, They provide reliable and fast pH detection, and they are used in various fields.
Sensor

