Overview
In This Tutorial, I will show how you interface the Moisture Sensor With Arduino Nano Microcontroller And How You Write the Code.
you just connected to the soil moisture sensor and it can measure moisture or water level content in it. it gives an Analog value when the moisture level is high and is moisture is low the value is low.
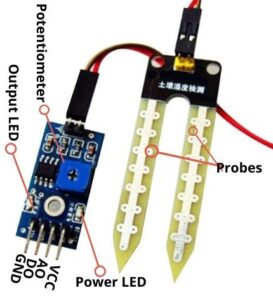
Soil Moisture Sensor Has 3 Pin VCC, GND And Analog Pin
Soil Moisture Sensor
Soil Moisture Sensor is measuring the soil and also the water level. in the sense includes a potentiometer to set the desired moisture threshold. when the moisture in the soil is less than the threshold value the output side is LOW And if the Soil is More Then the threshold Value The output Side Is High.
Specifications:-
- Operating voltage:- 3.3v To 5v
- Dual Mode Output, Analog Output
- Having LM939 Comparator Ic
- Cable Length: Approx 21cm
- Vcc:- 5v
- GND:- GND
- D0:- Digital output Interface
- A0:- Analog Output Interface
Soil Moisture Sensor Pinout
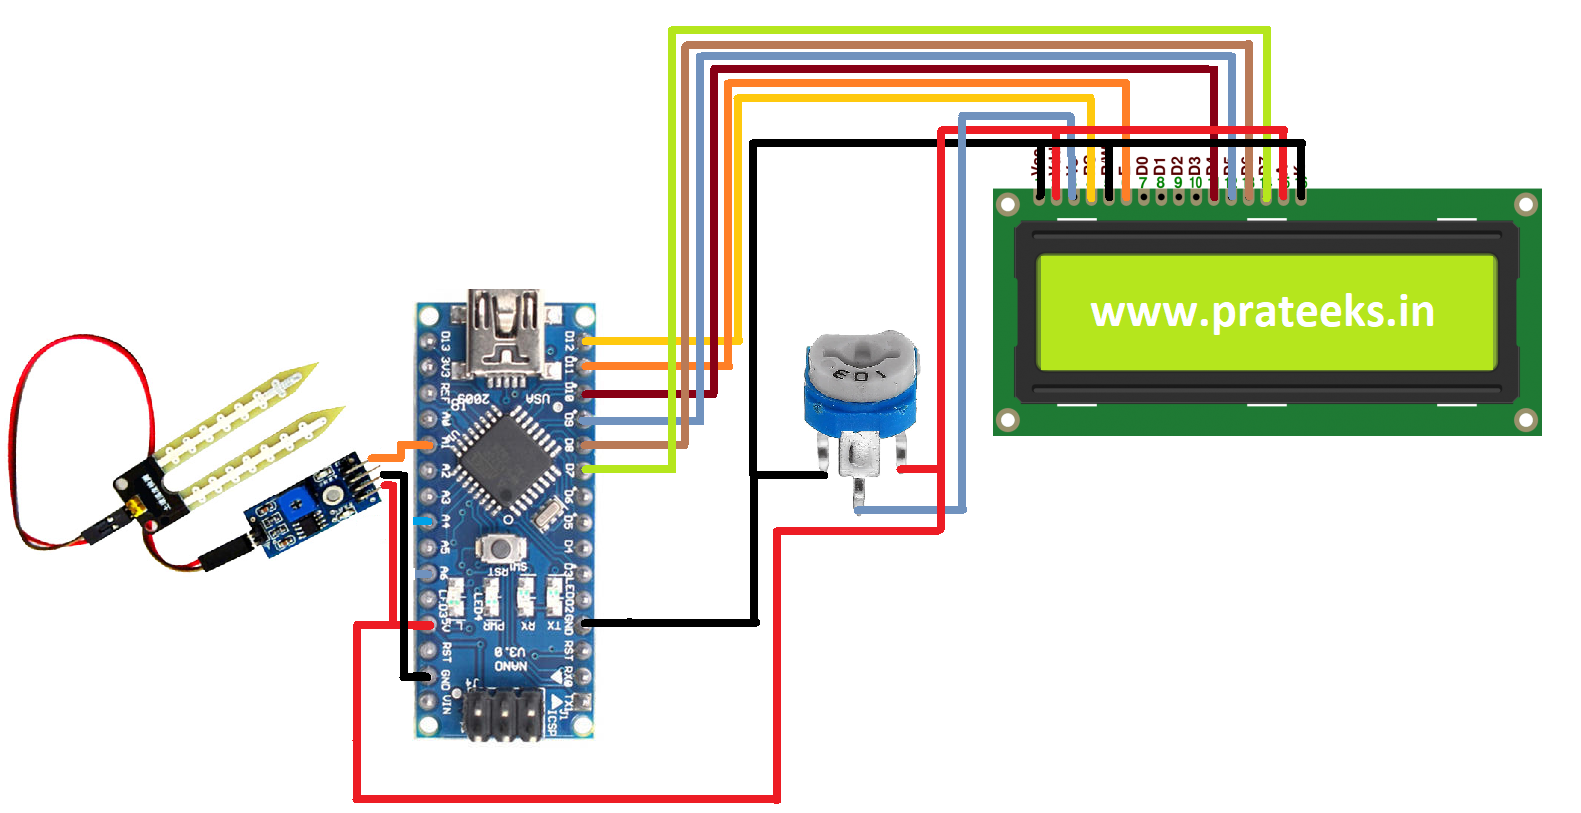
Wiring Diagram Soil Moisture Sensor With Arduino
Testing Of Soil Moisture Sensor
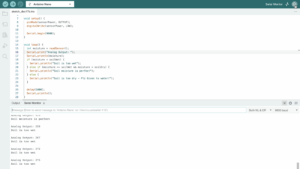
Soil Moisture Sensor Reading In Serial Monitor
Code
|
1 2 3 4 5 6 7 8 9 10 11 12 13 14 15 16 17 18 19 20 21 22 23 24 25 26 27 28 29 30 31 32 33 34 35 36 |
#define soilWet 400 #define soilDry 620 #define sensorPower 4 #define sensorPin A1 void setup() { pinMode(sensorPower, OUTPUT); digitalWrite(sensorPower, LOW); Serial.begin(9600); } void loop() { int moisture = readSensor(); Serial.print("Analog Output: "); Serial.println(moisture); if (moisture < soilWet) { Serial.println("Soil is too wet"); } else if (moisture >= soilWet && moisture < soilDry) { Serial.println("Soil moisture is perfect"); } else { Serial.println("Soil is too dry - Plz Given to water!"); } delay(1000); Serial.println(); } int readSensor() { digitalWrite(sensorPower, HIGH); delay(10); int val = analogRead(sensorPin); digitalWrite(sensorPower, LOW); return val; } |
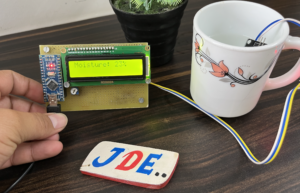
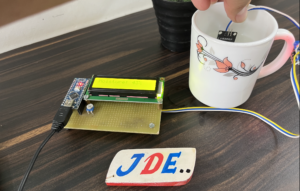
Soil Moisture Sensor Reading In LCD Display
Code
|
1 2 3 4 5 6 7 8 9 10 11 12 13 14 15 16 17 18 19 20 21 22 23 24 25 26 |
#include <LiquidCrystal.h> int sensorPin = A1; int outputValue ; LiquidCrystal lcd(12, 11, 10, 9, 8, 7); void setup() { lcd.begin(16, 2); lcd.print("Mositure Sensor"); delay(2000); } void loop() { outputValue= analogRead(sensorPin); outputValue = map(outputValue,550,0,0,100); lcd.setCursor(0, 0); lcd.print("Moisture: "); lcd.print(outputValue); lcd.print("%"); delay(1000); lcd.clear(); } |
Automatic Plant Watering System
Code
|
1 2 3 4 5 6 7 8 9 10 11 12 13 14 15 16 17 18 19 20 21 22 23 24 25 26 27 28 29 30 31 32 33 34 35 36 37 38 39 40 41 42 43 44 45 46 47 48 49 50 51 52 53 54 55 56 57 58 59 60 61 62 |
//Prateek //www.prateeks.in #include <Wire.h> #include <LiquidCrystal.h> LiquidCrystal lcd(12, 11, 10, 9, 8, 7); int m; int percentage; int led = 13; int map_low = 1023; int map_high = 280; void setup() { pinMode(A5, INPUT_PULLUP); pinMode(4, OUTPUT); pinMode(5, OUTPUT); Serial.begin(9600); lcd.begin(16, 2); lcd.clear(); lcd.setCursor(0, 0); lcd.print("Irrigation Systm"); lcd.setCursor(0, 1); lcd.print("Pump="); lcd.setCursor(10, 1); lcd.print("M= "); } void loop() { int m = analogRead(A5); Serial.println(m); percentage = map(m, map_low, map_high, 0, 100); lcd.setCursor(10, 1); lcd.print("M= "); if (percentage > 100) { percentage = 100; } lcd.setCursor(12, 1); lcd.print(percentage); lcd.print("%"); lcd.print(" "); delay(200); if (m >= 780) { digitalWrite(4, HIGH); lcd.setCursor(6, 1); lcd.print("ON "); digitalWrite(led, LOW); } else if (m <= 770) { digitalWrite(4, LOW); lcd.setCursor(6, 1); lcd.print("OFF"); digitalWrite(led, HIGH); } } |
Video
If You are Interested In More Projects Then Plz Check Out
