Introduction
In this Project, we demonstrate a unique project that converts sign language into audible speech using flex sensors. By detecting the movement and bending of fingers, the flex sensors capture specific hand gestures, which are then processed and translated into corresponding voice outputs
A large fraction of India’s population is speech impaired. In addition to this communication to sign language is not a very easy task. This problem demands a better solution that can assist the speech-impaired population in conversation without any difficulties. As a result, it reduces the communication gap for the speech impaired.
Bill of Materials
S.N | Components | Quantity | Link To Buy |
1 | Flex Sensor | 5 | |
2 | Arduino Nano | 1 | |
3 | DF Mini Player | 1 | |
4 | Speaker | 1 | |
5 | Zero PCB | 1 |
Component Overview
Arduino Nano
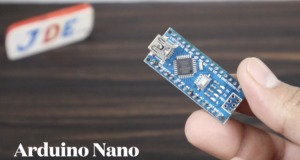
In this Project, I used the Arduino Nano microcontroller because of its small size. Arduino Nano’s operating voltage is 5v and the flex Sensor operates at 5v that’s why I chose this microcontroller.
Here is the Pin Conviction of the Arduino Nano microcontroller. I used the 5 flex sensors and all sensors were given the output of Analog form Arduino Nano in Built 8 Analog pin (A0-A8).
Flex Sensor
A flex sensor is a resistive device that changes its resistance based on the amount of bending or flexing applied to it. It is usually made of a flexible material, such as a thin film or plastic, embedded with conductive material. As the sensor bends, the conductive material’s path changes, altering the resistance of the sensor.
- Flex Sensor is used in various fields, like control robots, Control Home Applications, and speech conversion.
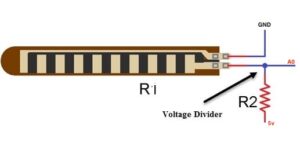
- Flex Sensor Has Two leads you see in the image and acts like a variable Resister.
- The Flex Sensor Output of resistance changes In two pins, when the voltage changes across the leads the resistance will change.
- The Flex Sensor operating voltage is 0-05v And the Sensor Flat resistance is 25Kohm
The flex sensor’s resistance varies in proportion to the angle of bending. When the sensor is in a relaxed or straight position, it exhibits a specific resistance value. As it bends, the resistance changes, allowing us to interpret the degree of bending.

Df Mini Player
The DF Mini Player is a module designed to play audio files from a microSD card. It supports various audio formats, including MP3, WAV, and WMA. The module incorporates a microSD card slot, a built-in amplifier, and a 3.5mm audio jack for connecting speakers or headphones. It also features a simple serial communication interface, making it compatible with Arduino and other microcontrollers.
- DF mini is a Small Playback Music System, is provides alerts or Sounds When the MicroController gives the Command.
- You Just Save the MP3 File On the SD Card And just put the DF Mini But which name or number do you put on the SD card same name or number Given To The Code?
- Df Mini is Supported by the UART Connection.
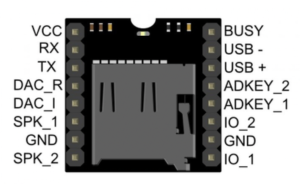
- Df mini operating voltage is 3.5v to 5v you just Connect the VCC to Arduino 5v and GND Will connect to the GND.
- Rx Pin Will be Connected to the Arduino D10 PIN And the Tx Pin Will be Connected To the Arduino nano D9 PIN.
Key Features and Functionality
Audio File Playback: The DF Mini Player can play audio files stored on a microSD card. It supports a wide range of audio formats, allowing for versatile audio playback options.
Volume Control: The module provides volume control functionality, allowing you to adjust the audio output to the desired level.
Built-in Amplifier: The DF Mini Player includes a built-in amplifier, enabling direct connection to speakers or headphones without requiring additional external amplification.
Serial Communication Interface: The module communicates with the Arduino or microcontroller using a simple serial protocol. This makes it easy to control and trigger audio playback from the Arduino code.
Easy Integration: The DF Mini Player is designed to be easily integrated into Arduino projects. It requires minimal wiring and can be powered directly from the Arduino’s 5V supply.
Speaker
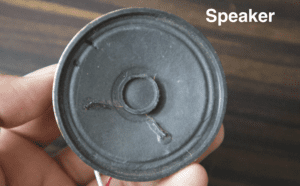
In this Project, I used the 8 Ohm / 0.25 watt Speaker and the sound of the speaker is relay clear and proper way sound.
Zero PCB
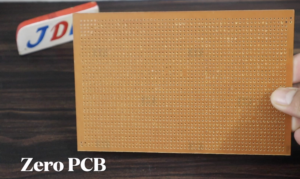
- In this Project I used the 4×4 zero PCB is Used to Build The Prototypes or Testing Of Any Project.
- On the Back Side Of the Zero PCB, You Sold all the components.
Circuit Diagram
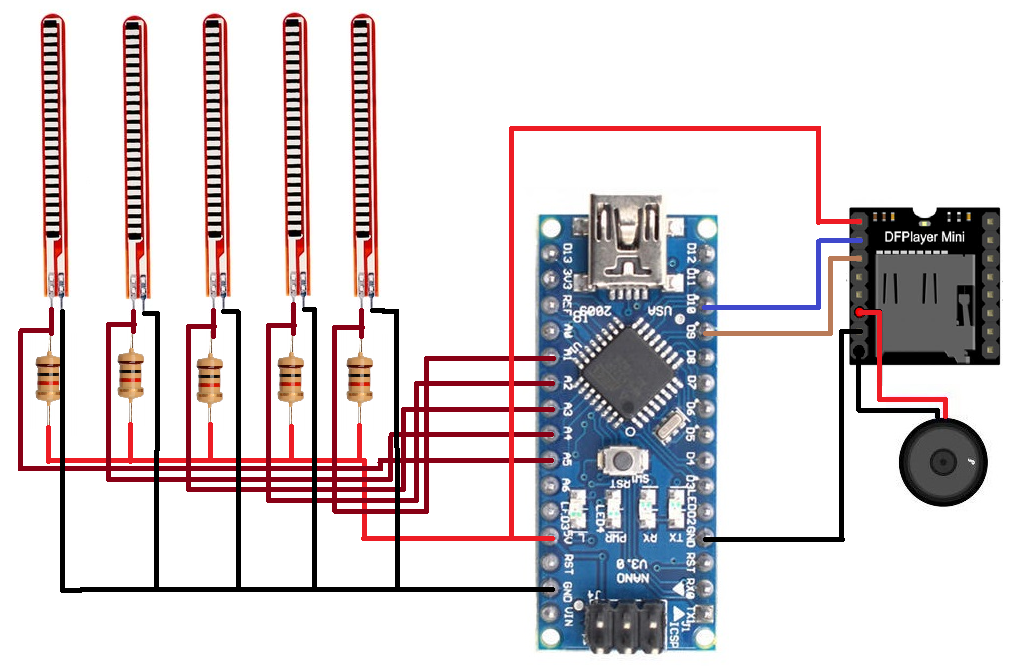
In this circuit Diagram, I will show the Proper Pin where I connected the All Sensor and modules with an Arduino Nano microcontroller.

- Connect the +5V pin of the Arduino to the +5V pin of the Flex Sensor and DF Mini Player.
- Connect the GND (ground) pin of the Arduino to the GND pins of the Flex Sensor and DF Mini Player.
- Connect the analog output pin (A0) of the Flex Sensor to the A0 pin of the Arduino.
- Connect the digital pins D9 and D10 of the Arduino to the TX and RX pins of the DF Mini Player, respectively.
- Connect the +5V and GND pins of the DF Mini Player to the +5V and GND pins of the Arduino.
- Connect digital pins D2, D3, and D4 of the Arduino to the Blue, Green, and Red LEDs, respectively.
- Connect the Speaker/Headphones to the audio output jack of the DF Mini Player.
Source Code
For Raw value In Serial Monitor
|
1 2 3 4 5 6 7 8 9 10 11 12 13 14 |
const int flexPin = A1; void setup() { Serial.begin(9600); } void loop() { int flexValue; flexValue = analogRead(flexPin); Serial.print("sensor: "); Serial.println(flexValue); delay(20); } |
This Code Is Valid Only for 1 Flex sensor fist you connect 1 Flex sensor and take the reading in the serial monitor then you use more Flex sensors.
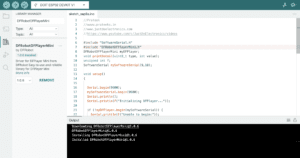
First Add the DFRobotDFPlayerMini Library
Now upload the Code
|
1 2 3 4 5 6 7 8 9 10 11 12 13 14 15 16 17 18 19 20 21 22 23 24 25 26 27 28 29 30 31 32 33 34 35 36 37 38 39 40 41 42 43 44 45 46 47 48 49 50 51 52 53 54 55 56 57 58 59 60 |
//Prateek //wwww.prateeks.in //www.justdoelectronics.com //https://www.youtube.com/c/JustDoElectronics/videos #include "SoftwareSerial.h" #include "DFRobotDFPlayerMini.h" DFRobotDFPlayerMini myDFPlayer; void printDetail(uint8_t type, int value); unsigned int f; SoftwareSerial mySoftwareSerial(9,10); void setup() { Serial.begin(9600); mySoftwareSerial.begin(9600); Serial.println(); Serial.println(F("Initializing DFPlayer...")); if (!myDFPlayer.begin(mySoftwareSerial)) { Serial.println(F("Unable to begin:")); Serial.println(F("1.Please recheck the connection!")); Serial.println(F("2.Please insert the SD card!")); while (true); } Serial.println(F("DFPlayer Mini online.")); myDFPlayer.volume(30); } void loop() { f = analogRead(1); Serial.println(f); if (f > 320) { Serial.println("Please Give Me Water"); myDFPlayer.play(1); delay(1000); } else if ((f < 320) && (f > 280)) { Serial.println("Please Give Me Food"); myDFPlayer.play(2); delay(1000); } else if ((f < 200) && (f > 100)) { Serial.println("Give Me Water"); myDFPlayer.play(3); delay(1000); } else { if (f > 100) } delay(50); } |
Project Demo
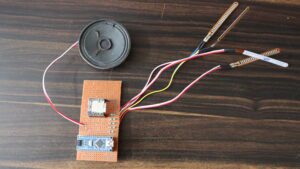
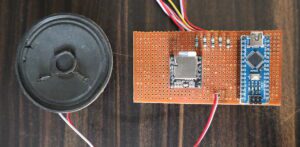
- Now I solder all the components and assemble them in zero PCB.
- Now you upload all mp3 sound to an SD card and put it in DF Player.
Video Tutorial
Conclusion
This system can help facilitate communication between sign language users and individuals who do not understand sign language.
More Arduino Tutorial
- Soil Moisture Sensor With Arduino
- DS18B20 Sensor With Arduino
- Water Level Sensor With Arduino
- Rain Sensor With Arduino
- BMP-180 Sensor With Arduino




thanks for the project with source code