MQ2 Gas Leakage Detection With Blynk Notification
MQ2 Gas Leakage Detection With Blynk Notification - step by step
Introduction
In This Tutorial, We Are Going To Learn How You Make Your Own GAS Detector With MQ-2 Sensor And ESP8266 or ESP32. You get the alert information on your mobile and LCD if there is any gas leakage. And You are monitoring the gas level anywhere in the World.
Bill Of Material
These are the required components For This Project.
S.N | Component | Quantity | Link To Buy |
1 | NodeMCU (ESP8266) | 1 | |
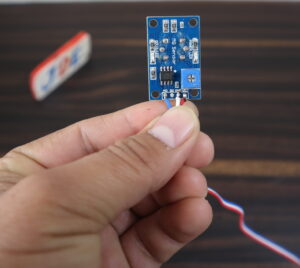
2 | MQ-2 Sensor | 1 | |
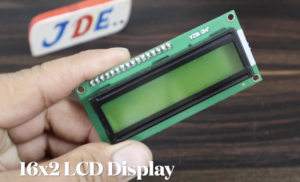
3 | 16x2 LCD Diaplay | 1 | |
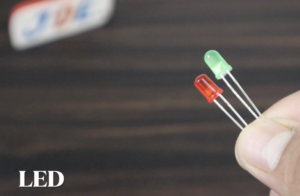
4 | Red Led | 1 | |
5 | Green Led | 1 | |
6 | Buzzer | 1 |
ESP8266
16×2 LCD Display
MQ-2 Sensor
Red Led & Green Led
Buzzer
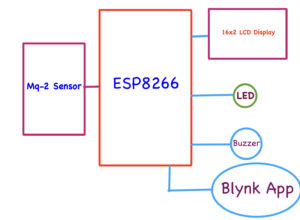
Block Diagram
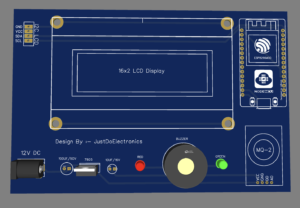
Circuit Diagram
- In the circuit diagram, we used ESP8266.
- the MQ-2 Sensor Analog Output is connected to Pin Number A0.
- And We used the 2 Led Red And Green and They connected To The Pin Number D5 & D7.
- for Sound indication, we Used the buzzer and they connected to the pin number D6.
- We Also Used The 16×2 LCD Display And They Connected to Pin Numbers D1 And D2.
- GND – GND
- VCC – GND
- SDA – D2
- SCL – D1
PCB Design
Set up Blynk IoT Cloud
If you are interested in more then refer to the Following Article.
fist you go to the Blynk Website And login in a fist.
Setp1
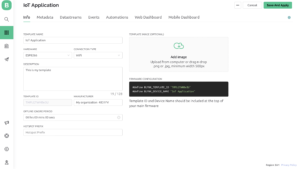
Now We creating the Template, I have selected ESP8266 As a Hardware bust we used virtual Pins to create the databases, so we can connect any controller with this template.
Step2
Step3
Step4
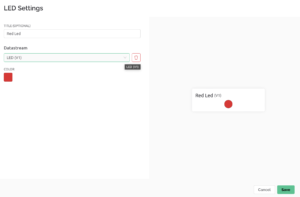
- I have added 4 Events. Whenever the Event occurs I will get The Alert information.
Step5
Step6
Step7
Step8
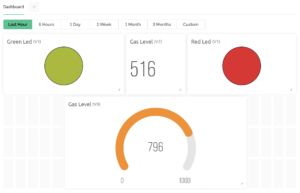
- Now We Created the final Webdesboard
Final Step
Source Code
Before We Uploading The Code Just Change These Things
|
1 2 3 4 5 6 7 8 |
#define BLYNK_TEMPLATE_ID "TMPLGTWHBe3U" #define BLYNK_DEVICE_NAME "IoT Application" #define BLYNK_AUTH_TOKEN "uSGu_jMyZNAB9dy9xwOtlLCd4tApOD" char ssid[] = "xxxxxxxxxx"; char pass[] = "xxxxxxxxxx"; |
Then We Uploading the Code In ESP8266
|
1 2 3 4 5 6 7 8 9 10 11 12 13 14 15 16 17 18 19 20 21 22 23 24 25 26 27 28 29 30 31 32 33 34 35 36 37 38 39 40 41 42 43 44 45 46 47 48 49 50 51 52 53 54 55 56 57 58 59 60 61 62 63 64 65 66 67 68 69 70 71 72 73 74 75 76 77 78 79 80 81 82 83 84 85 86 87 88 89 90 91 |
#include <LiquidCrystal_I2C.h> LiquidCrystal_I2C lcd(0x27, 16, 2); #define BLYNK_TEMPLATE_ID "TMPLGTWHBe3U" #define BLYNK_DEVICE_NAME "IoT Application" #define BLYNK_AUTH_TOKEN "uSGu_jMyZNAB9dy9xwOtlLCd4tApOD" #define BLYNK_PRINT Serial #include <ESP8266WiFi.h> #include <BlynkSimpleEsp8266.h> char auth[] = BLYNK_AUTH_TOKEN; char ssid[] = "xxxxxxxxxx"; char pass[] = "xxxxxxxxxx"; BlynkTimer timer; #define MQ2 A0 #define GREEN D5 #define RED D6 #define buzzer D7 int MQ2_Val = 0; WidgetLED led1(V1); WidgetLED led2(V3); void setup() { lcd.begin(); lcd.backlight(); lcd.setCursor(0, 0); lcd.print(" Welcome To"); lcd.setCursor(0, 1); lcd.print("JustDoElectronic"); delay(3000); lcd.clear(); Serial.begin(9600); pinMode(GREEN, OUTPUT); pinMode(RED, OUTPUT); pinMode(buzzer, OUTPUT); //justdoelectronics Blynk.begin(auth, ssid, pass); delay(2000); timer.setInterval(1000L, mySensor); } void loop() { Blynk.run(); timer.run(); } void mySensor() { MQ2_Val = analogRead(MQ2); for (int x = 0; x < 100; x++) { MQ2_Val = MQ2_Val + analogRead(MQ2); } MQ2_Val = MQ2_Val / 100.0; Blynk.virtualWrite(V0, MQ2_Val); Blynk.virtualWrite(V2, MQ2_Val); if (MQ2_Val > 900) { Blynk.notify("Gas Detected!"); digitalWrite(GREEN, LOW); digitalWrite(RED, HIGH); digitalWrite(buzzer, HIGH); lcd.setCursor(0, 1); lcd.print(" Alert. "); Blynk.email("test@gmail.com", "Alert", "Gas Leakage Detected!"); Blynk.logEvent("gas_alert", "Gas Leakage Detected"); led1.on(); led2.off(); } else { digitalWrite(GREEN, HIGH); digitalWrite(RED, LOW); digitalWrite(buzzer, LOW); lcd.setCursor(0, 1); lcd.print(" Normal "); led1.off(); led2.on(); } Serial.print("MQ2 Level: "); lcd.setCursor(0, 0); lcd.print("Gas Level: "); lcd.print(MQ2_Val); Serial.println(MQ2_Val); } |
Set Up Mobile Dashboard in Blynk IoT App
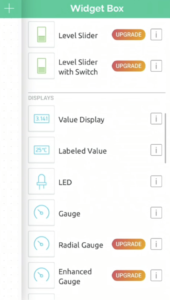
- First Download and install the Blynk IoT App from The Google Play Store Or App Store.
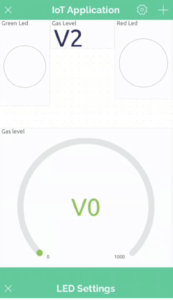
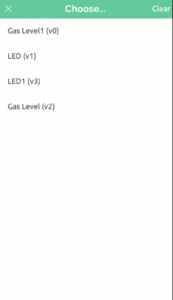
Open the Blynk IoT App and Select the template
Project Demo
Now We Test the Project I have used the gas and I just on the gas after a few seconds the MQ-2 Sensor Detected the gas And the Blynk Web Dashboard is Red Led ON LCD Also Display The Alert Message Buzzer Beeping.
When the GAS level is Less Than To 900 Value Then Normal Condiction Geen led On And Buzzer Will Stop Beeping.
Now we used the Mobile Application and connection of the sensor normally that’s why the green led will glow.
Now We Test the Sensor I have used the Lighter. just hold the lighter in front of the MQ-2 Sensor When crossing the 900 value we get a notification alert.
This Is a very Useful IoT-based or Industry Safety Project. You Can Connect Multiple Sensor And Get the Alert Information.
Click Here For More Such ESP8266 projects.
Video tutorial
If you Like Do Share Your Feedback on this IoT Project. Very Thank You For Your Time 😊

