Arduino Projects
LM35 Temperature Sensor Arduino Tutorial
Overview
In This Tutorial, I will just show Thw how you interface the LM35 Sensor With Arduino Nano Microcontroller And How You Write the Code.
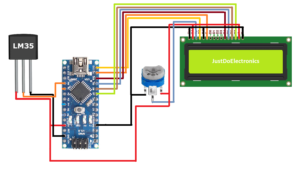
LM35 Sensor Is Analog Sensor And They Will be Connected To The Arduino Nano A0 Pin Number.
if you are interested in More About The LM35 Sensor Then Just Read Out The LM35 Datasheet. I Will Given The Like Just Download The Pdf File And read It.
LM35 Vs DS18B20
LM35 Pinout
In This Image, I will Just Show The Front View Of The LM35 Sensor the 1 pin is the Vcc, the 2 Pin Is Vout I mean is the Analog Pin and The 3 Pin Is The ground(GND).
Wiring Diagram LM35 With Arduino
Testing Of LM35
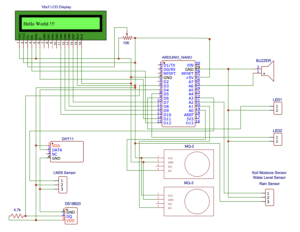
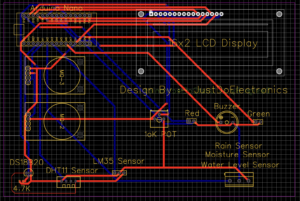
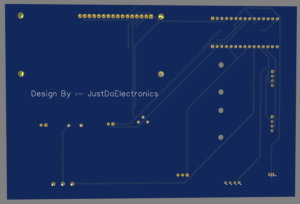
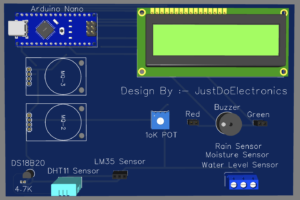
PCB Design
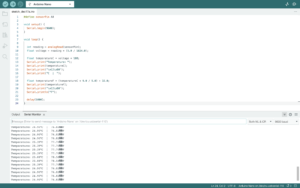
Display LM35 Reading In Serial Monitor
Code
|
1 2 3 4 5 6 7 8 9 10 11 12 13 14 15 16 17 18 19 20 21 22 23 24 |
#define sensorPin A0 void setup() { Serial.begin(9600); } void loop() { int reading = analogRead(sensorPin); float voltage = reading * (5.0 / 1024.0); float temperatureC = voltage * 100; Serial.print("Temperature: "); Serial.print(temperatureC); Serial.print("\xC2\xB0"); Serial.print("C | "); float temperatureF = (temperatureC * 9.0 / 5.0) + 32.0; Serial.print(temperatureF); Serial.print("\xC2\xB0"); Serial.println("F"); delay(1000); } |
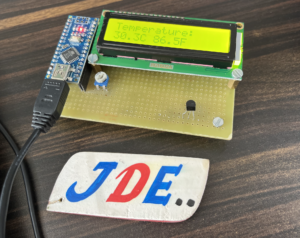
Display LM35 Sensor Reading In LCD Display
Code
|
1 2 3 4 5 6 7 8 9 10 11 12 13 14 15 16 17 18 19 20 21 22 23 24 25 26 27 28 29 30 31 32 33 34 35 36 37 38 39 |
#include <LiquidCrystal.h> LiquidCrystal lcd(12, 11, 10, 9, 8, 7); byte Degree[] = { B00111, B00101, B00111, B00000, B00000, B00000, B00000, B00000 }; #define sensorPin A0 void setup() { lcd.begin(16,2); lcd.createChar(0, Degree); } void loop() { int reading = analogRead(sensorPin); float voltage = reading * (5.0 / 1024.0); float temperatureC = voltage * 100; lcd.setCursor(0, 0); lcd.print("Temperature:"); lcd.setCursor(0, 1); lcd.print(temperatureC, 1); lcd.print("C "); float temperatureF = (temperatureC * 9.0 / 5.0) + 32.0; lcd.print(temperatureF, 1); lcd.print("F "); delay(1000); } |
Code With Oled Display
|
1 2 3 4 5 6 7 8 9 10 11 12 13 14 15 16 17 18 19 20 21 22 23 24 25 26 27 28 29 30 31 32 33 34 35 36 37 38 39 40 41 42 43 44 45 46 47 48 49 50 51 52 53 54 55 56 57 58 59 60 61 62 63 64 65 66 |
#include <Wire.h> #include <Adafruit_GFX.h> #include <Adafruit_SSD1306.h> #define SCREEN_WIDTH 128 #define SCREEN_HEIGHT 64 Adafruit_SSD1306 display(SCREEN_WIDTH, SCREEN_HEIGHT, &Wire, -1); const int sensorPin = A0; float sensorValue; float voltageOut; float temperatureC; float temperatureF; void setup() { pinMode(sensorPin, INPUT); Serial.begin(9600); if(!display.begin(SSD1306_SWITCHCAPVCC, 0x3C)) { Serial.println(F("SSD1306 allocation failed")); for(;;); } delay(2000); display.clearDisplay(); display.setTextColor(WHITE); } void loop() { sensorValue = analogRead(sensorPin); voltageOut = (sensorValue * 5000) / 1024; temperatureC = voltageOut / 10; temperatureF = (temperatureC * 1.8) + 32; Serial.print("Temperature(ºC): "); Serial.print(temperatureC); Serial.print(" Temperature(ºF): "); Serial.print(temperatureF); display.clearDisplay(); display.setTextSize(1); display.setCursor(0,0); display.print("Temperature: "); display.setTextSize(2); display.setCursor(0,10); display.print(temperatureC); display.print(" "); display.setTextSize(1); display.cp437(true); display.write(167); display.setTextSize(2); display.print("C"); display.setTextSize(1); display.setCursor(0, 35); display.print("Temperature: "); display.setTextSize(2); display.setCursor(0, 45); display.print(temperatureF); display.print(" "); display.setTextSize(1); display.cp437(true); display.write(167); display.setTextSize(2); display.print("F"); display.display(); delay(1000); } |
If You are Interested In More Projects Then Plz Check Out
- Vehicle Accident Alert System
- DIY Ventilator Using Arduino
- Arduino Based Blind Stick With GPS And GSM
- Dam Monitoring System Using Arduino

