Overview
- The MQ-3 sensor is widely used to detect alcohol vapour concentrations. By interfacing the MQ-3 sensor with an Arduino board and integrating a 16×2 LCD display, you can create a system that measures alcohol levels and displays the readings in a user-friendly format. This article provides a detailed step-by-step guide on how to set up the Arduino, connect the MQ-3 sensor, and display the alcohol readings on the LCD display.
- Mq3 Sensor is most commonly used in the MQ Sensor Series.is Suitable for Detecting Alcohol, CH4, LPG And Co.
- It is a metal oxide Semiconductor (MOS) Type Sensor Chemiresistors because the sensing is based on the resistance of the Sensing Material when exposed to alcohol.
MQ-3 Sensor
- The MQ-3 sensor is a gas sensor module widely used for detecting alcohol vapour concentrations. It is commonly employed in applications such as breathalyzers, alcohol detection systems, and safety devices. The sensor operates based on the principle of Metal Oxide Semiconductor (MOS) technology.
- The MQ-3 sensor consists of a tin dioxide (SnO2) sensing element, which exhibits a change in electrical resistance when it comes into contact with alcohol vapours. The resistance of the sensing element decreases as the alcohol concentration increases.
- In MQ-3 Sensor, the Analog Pin output Voltage provided by the sensor (A0 Pin) varies in proportion to the alcohol concentration. The higher the alcohol concentration in the air, the output voltage is High Whereas a lower concentration gives a lower Output Voltage.
Features
- High Sensitivity: The sensor has a high sensitivity to alcohol vapours, allowing it to detect even low concentrations accurately.
- Fast Response Time: The MQ-3 sensor provides rapid response when exposed to alcohol vapours, making it suitable for real-time applications.
- Analog Output: The sensor provides an analog output voltage that varies in proportion to the alcohol concentration in the environment.
- Warm-Up Time: The MQ-3 sensor requires a warm-up time of around 24-48 hours to stabilize its readings. It is essential to allow the sensor to stabilize before obtaining accurate measurements.
Specifications
- Power requirements:- 5v
- Current Consumption:- 140mA
- Detecting Concentration:- 0.05-10mg/alcohol
- Sensitivity S:-Rs(Air)/Rs(0.4mg/L Alcohol)>-5
Application
- Breathalyzer Project
- Portable Alcohol Detector
- Environmental Monitoring Equipment
- Gas Level Monitoring
MQ-3 Sensor Pinout
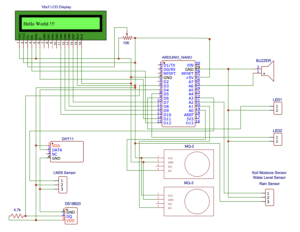
Wiring Diagram MQ-3 Sensor With Arduino
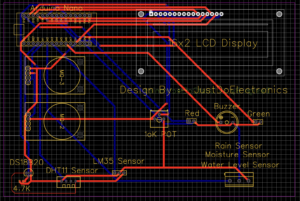
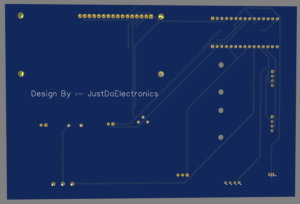
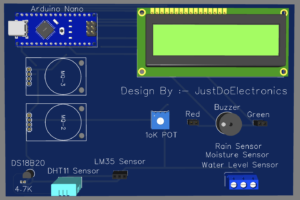
PCB Design
Testing Of MQ-3 Sensor
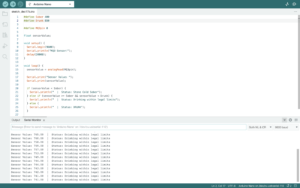
Display MQ-3 Sensor Reading In Serial Monitor
Code
|
1 2 3 4 5 6 7 8 9 10 11 12 13 14 15 16 17 18 |
#define MQ3pin 0 float sensorValue; void setup() { Serial.begin(9600); Serial.println("MQ3 Sensor!"); delay(20000); } void loop() { sensorValue = analogRead(MQ3pin); Serial.print("Sensor Value: "); Serial.println(sensorValue); delay(2000); } |
Display MQ-3 Sensor Reading in LCD Display
Code
|
1 2 3 4 5 6 7 8 9 10 11 12 13 14 15 16 17 18 19 20 21 22 23 24 25 26 27 28 29 30 31 |
#define Sober 90 #define Drunk 300 #define MQ3pin 0 float sensorValue; void setup() { Serial.begin(9600); Serial.println("MQ3 warming up!"); delay(20000); } void loop() { sensorValue = analogRead(MQ3pin); Serial.print("Sensor Value: "); Serial.print(sensorValue); if (sensorValue < Sober) { Serial.println(" | Status: Stone Cold Sober"); } else if (sensorValue >= Sober && sensorValue < Drunk) { Serial.println(" | Status: Drinking within legal limits"); } else { Serial.println(" | Status: DRUNK"); } delay(2000); } |
Code with 16×2 LCD Display
|
1 2 3 4 5 6 7 8 9 10 11 12 13 14 15 16 17 18 19 20 21 22 23 24 25 26 27 28 29 30 31 32 33 34 35 36 37 38 39 40 41 42 43 44 45 46 47 48 49 50 51 52 53 54 55 56 57 58 59 |
//prateek singh //www.prateeks.in #include <LiquidCrystal.h> LiquidCrystal lcd(12,11,10,9,8,7); #define sensor A0 #define led 13 #define buz 8 void setup() { Serial.begin(9600); lcd.begin(16,2); lcd.print("Alcohol Detector"); lcd.setCursor(0,1); lcd.print("www.prateeks.in"); delay(2000); pinMode(sensor, INPUT); pinMode(buz, OUTPUT); pinMode(led, OUTPUT); lcd.clear(); } void loop() { float adcValue=0; for(int i=0;i<10;i++) { adcValue+= analogRead(sensor); delay(10); } float v= (adcValue/10) * (5.0/1024.0); float mgL= 0.67 * v; Serial.print("BAC:"); Serial.print(mgL); Serial.print(" mg/L"); lcd.setCursor(0,0); lcd.print("BAC: "); lcd.print(mgL,4); lcd.print(" mg/L "); lcd.setCursor(0,1); if(mgL > 1.3) { lcd.print("Drunk "); Serial.println(" Drunk"); digitalWrite(buz, HIGH); digitalWrite(led, HIGH); } else { lcd.print("Normal "); Serial.println(" Normal"); digitalWrite(buz, LOW); digitalWrite(led, LOW); } delay(100); } |
If You are Interested In More Projects Then Plz Check Out
- Vehicle Accident Alert System
- DIY Ventilator Using Arduino
- Arduino Based Blind Stick With GPS And GSM
- Dam Monitoring System Using Arduino
Video
Conclusion
Interfacing the MQ-3 alcohol sensor with an Arduino board and a 16×2 LCD display allows you to create a system for monitoring alcohol vapour concentrations. By following this comprehensive guide, you can easily set up the hardware, upload the code, and visualize the alcohol readings on the LCD display. This project can find applications in breathalyzer devices, safety systems, and other scenarios where alcohol detection is required. Always exercise caution and adhere to legal regulations when working with alcohol-related measurements and devices.


