Introduction
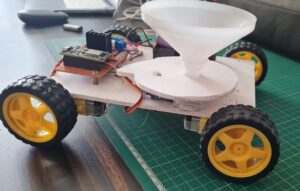
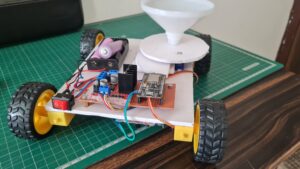
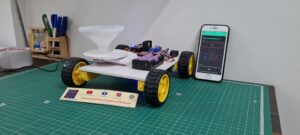
In this tutorial, we will guide you to building a Seed Sowing robot using an L298N motor driver, BO motor, and an ESP8266 microcontroller. The L298N motor driver will control the movement of the robot using Blynk App, and the BO motor will provide the necessary torque.
The ESP8266 microcontroller will be the brain of the Seed Sowing robot, allowing for wireless communication and control with the new Blynk app.
Component Need
S.N | Components | Quantity |
1 | ESP8266 Microcontroller | 1 |
2 | L298N motor driver | 1 |
3 | BO motor | 1 |
4 | Chassis for the robot | 1 |
5 | Servo Motor | 1 |
6 | Seed dispensing mechanism | 1 |
7 | Wires | 1 |
8 | Zero PCB | 1 |
9 | 9v Power supply | 1 |
ESP8266 Board
ESP8266 is a Wi-Fi module developed by Espressif Microcontroller Systems. In the board is a microcontroller unit And a built-in Wi-Fi Chip, It is the low-cost solution for Wi-Fi connectivity to various projects.
- Microcontroller: The module is a 32-bit microcontroller, which operates at 80 MHz clock speed. It provides a few GPIO (General Purpose Input/Output) pins that can be used to interface with L298N Motor Driver and Wifi.
- Wi-Fi Connectivity: The module supports 2.4 GHz And Wi-Fi 802.11 b/g/n standards, allowing it to connect to Wi-Fi networks and Also communicate over the internet.
- Memory: The module typically comes with different memory configurations. It has built-in flash memory for program storage and data storage.
L298N Motor Driver
The L298N is a popular motor driver integrated circuit (IC) commonly used in robotics and other applications to control the speed and direction of DC motors. It is designed to handle higher currents and provide robust motor control capabilities.
BO motor
A BO motor, also known as a geared DC motor, Here we used the 4 Bo Motor and the Robot will Move the robot with the help of the Bo Motor. It is also used in robotics and other applications that require precise control over motor speed and increased torque.
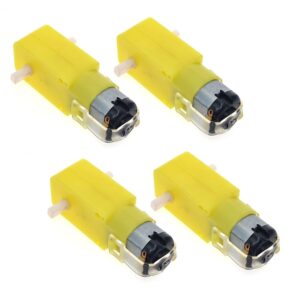
- Gear Mechanism: The feature of a BO motor is its gear mechanism. It consists of an integrated gearbox attached to the motor shaft. The gearbox contains gears that enable speed reduction or torque amplification.

Chassis for the robot
A BO motor-based chassis for a robot typically involves a design that incorporates four BO motors, one for each wheel, to achieve better manoeuvrability and control. Here’s an explanation of how to build a chassis for a robot with four BO motors
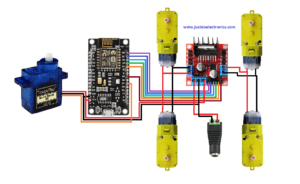
Circuit Diagram
ESP8266 Connections
-
- The VIN pin of the ESP8266 to the same power supply voltage used for the L298N.
- The GND pin of the ESP8266 to the ground of the power supply and the ground of the L298N.
- Establish a serial communication between the ESP8266 and your computer for programming purposes.
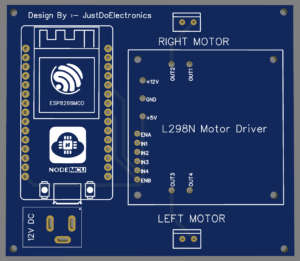
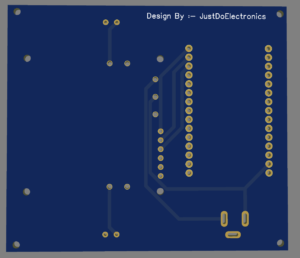
PCB Design
L298N Motor Driver Connections
-
- The VCC pin of the L298N to a power supply voltage of 9v for the motor operation.
- The GND pin of the L298N to the ground of the power supply and the ground of the ESP8266.
- The motor power supply’s positive terminal to the +12V pin of the L298N.
- The motor power supply’s negative terminal to the GND pin of the L298N.
BO Motor Connections
-
- The two terminals of the BO motor are the OUT1 and OUT2 pins of the L298N for one motor channel.
- And the other two terminals of the BO motor to the OUT3 and OUT4 pins of the L298N for the other motor channel.
- Ensure the motor polarity is correct. If the motor moves in the wrong direction, swap the connections of either OUT1/OUT2 or OUT3/OUT4 pins for the respective motor channel.
Blynk App Setup
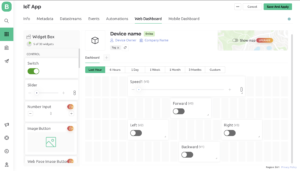
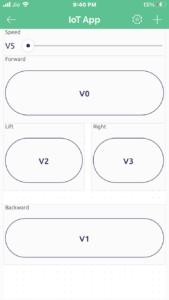
First, you have to set up a project in the Blynk app on your web dashboard And Smart Phone. after setting the app you receive an auth token which has to be provided in the code.
You can Download the Blynk app from Below the Links.
Open Blynk App, register with an email ID and then log in. After login in, we will create a project. Enter the all details as shown Below


Mobile Application


Source Code
|
1 2 3 4 5 6 7 8 9 10 11 12 13 14 15 16 17 18 19 20 21 22 23 24 25 26 27 28 29 30 31 32 33 34 35 36 37 38 39 40 41 42 43 44 45 46 47 48 49 50 51 52 53 54 55 56 57 58 59 60 61 62 63 64 65 66 67 68 69 70 71 72 73 74 75 76 77 78 79 80 81 82 83 84 85 86 87 88 89 90 91 92 93 94 95 96 97 98 99 100 101 102 103 104 105 106 107 108 109 110 111 |
#define BLYNK_PRINT Serial #include <ESP8266WiFi.h> #include <BlynkSimpleEsp8266.h> #define ENA D0 #define IN1 D1 #define IN2 D2 #define IN3 D3 #define IN4 D4 #define ENB D5 bool forward = 0; bool backward = 0; bool left = 0; bool right = 0; int Speed; char auth[] = "OaAek11MGCAZQwBTyr1lPNLsHhyrG8"; char ssid[] = "Prateek"; char pass[] = "12345"; void setup() { Serial.begin(9600); pinMode(ENA, OUTPUT); pinMode(IN1, OUTPUT); pinMode(IN2, OUTPUT); pinMode(IN3, OUTPUT); pinMode(IN4, OUTPUT); pinMode(ENB, OUTPUT); Blynk.begin(auth, ssid, pass, "blynk.cloud", 80); } BLYNK_WRITE(V0) { forward = param.asInt(); } BLYNK_WRITE(V1) { backward = param.asInt(); } BLYNK_WRITE(V2) { left = param.asInt(); } BLYNK_WRITE(V3) { right = param.asInt(); } BLYNK_WRITE(V5) { Speed = param.asInt(); } void smartcar() { if (forward == 1) { carforward(); Serial.println("carforward"); } else if (backward == 1) { carbackward(); Serial.println("carbackward"); } else if (left == 1) { carturnleft(); Serial.println("carfleft"); } else if (right == 1) { carturnright(); Serial.println("carright"); } else if (forward == 0 && backward == 0 && left == 0 && right == 0) { carStop(); Serial.println("carstop"); } } void loop() { Blynk.run(); smartcar(); } void carforward() { analogWrite(ENA, Speed); analogWrite(ENB, Speed); digitalWrite(IN1, LOW); digitalWrite(IN2, HIGH); digitalWrite(IN3, HIGH); digitalWrite(IN4, LOW); } void carbackward() { analogWrite(ENA, Speed); analogWrite(ENB, Speed); digitalWrite(IN1, HIGH); digitalWrite(IN2, LOW); digitalWrite(IN3, LOW); digitalWrite(IN4, HIGH); } void carturnleft() { analogWrite(ENA, Speed); analogWrite(ENB, Speed); digitalWrite(IN1, HIGH); digitalWrite(IN2, LOW); digitalWrite(IN3, HIGH); digitalWrite(IN4, LOW); } void carturnright() { analogWrite(ENA, Speed); analogWrite(ENB, Speed); digitalWrite(IN1, LOW); digitalWrite(IN2, HIGH); digitalWrite(IN3, LOW); digitalWrite(IN4, HIGH); } void carStop() { digitalWrite(IN1, LOW); digitalWrite(IN2, LOW); digitalWrite(IN3, LOW); digitalWrite(IN4, LOW); } |
Project Demo
Video Tutorial
Conclusion
Building a robot using an L298N motor driver, a BO motor, and an ESP8266 microcontroller allows for precise motor control and wireless communication capabilities. if try to is used in various applications such as seed sowing.
Robot-Related More Projects
