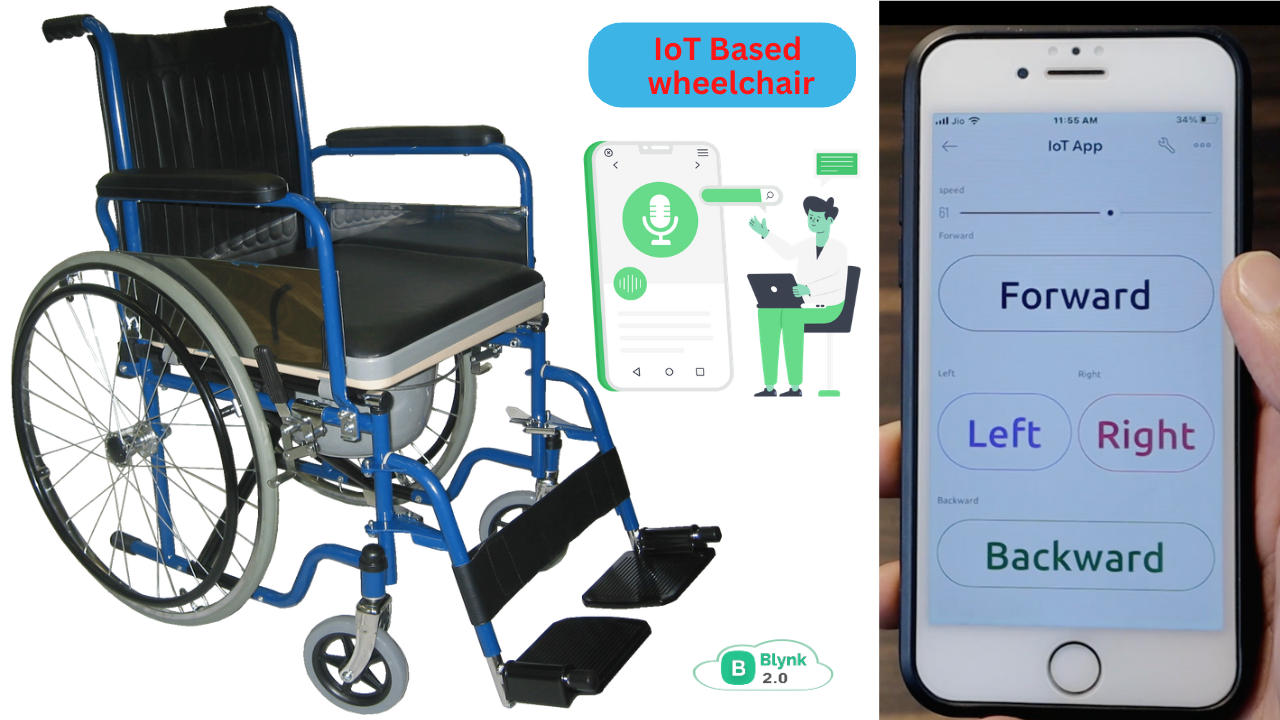
IoT Based Smart Wheelchair For Disabled People
IoT Based Smart Wheelchair For Disabled People using ESP8266
Introduction
In This Tutorial, we will present a multifunction smart wheelchair for disabled people along with voice Command.
The Wheelchair moves in Left, Right, Forward and Backward directions. the Movement controller by a Blynk app or manual Push Button Through.
All four Dc motors are interfaced with the motor driver and are command button will also be given if a person anything wants to press the button the voice message will be played.
Why is Making?
- Nowadays, Disabled persons face so much difficulty That we have designed simple automatic techniques that have to be developed for the movement of wheelchairs and so on. This wheelchair is controlled by a mobile application through a manual push button.
- Also if a disabled person wants anything like Water, Dinner, or anything then He/She Presses the button the speaker will play the Command Message.
- The Proposed system is very much more effective than the existing system in so many aspects. the proposed system has two ways of controlling the wheelchair button and also controls the Blynk application.
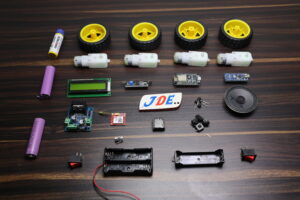
Bill Of Materials
S.N | Cmponents | Quantity | LINK To Buy |
1 | Arduino Nano | 1 | |
2 | ESP8266 | 1 | |
3 | 16x2 LCD Display | 1 | |
4 | Motor Driver (L298N) | 1 | |
5 | DF Mini Player | 1 | |
6 | Speaker | 1 | |
7 | Push Button | 10 | |
8 | Bo Motor | 4 | |
9 | Bo Motor Wheels | 4 | |
10 | 8x6 Plastic BOX | 1 | |
11 | Zero PCB | 1 | |
12 | GSM Moule (sim800l) | 1 | |
13 | 3.7v Lithium Battery | 1 |
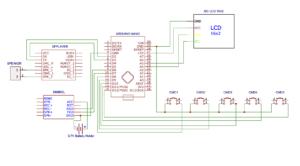
Circuit Diagram
- To control the wheelchair through the Blynk app making the project required a few components.
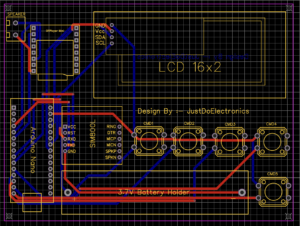
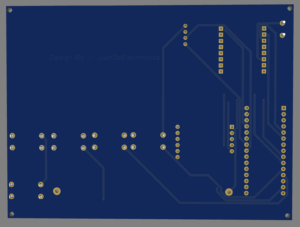
- Making the PCB requires EasyEda software to make the proper PCB.
- We used the Arduino Nano, DFmini player, 16×2 LCD Display, SIM 800L module, and push button.
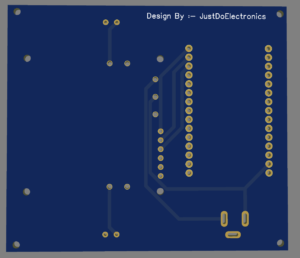
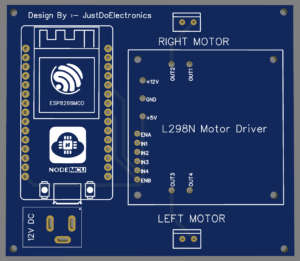
- Controlling the Robot can then require the Node MCU Microcontroller & L298N motor driver module.
Robot Circuit Diagram
- Just check Out the Previous Article Then You Understand More about How To set up Your Own Blynk App Click Here
Source Code
First, we make the proper Hardware then you are required to upload the code. Before Upload the Previous Article Then You Understand More about How To set up Your Own Blynk App Click Here
We will give you the proper code of the project when you upload the code then it is required to change a few things.
- AURH()
- SSID()
- PASS()
- just upload the code & open the Arduino IDE serial monitor to check whether the wifi will connect or not.
- When your wifi is connected to the NODEMCU then you control the Robot with the help of the Blynk app.
Code1
|
1 2 3 4 5 6 7 8 9 10 11 12 13 14 15 16 17 18 19 20 21 22 23 24 25 26 27 28 29 30 31 32 33 34 35 36 37 38 39 40 41 42 43 44 45 46 47 48 49 50 51 52 53 54 55 56 57 58 59 60 61 62 63 64 65 66 67 68 69 70 71 72 73 74 75 76 77 78 79 80 81 82 83 84 85 86 87 88 89 90 91 92 93 94 95 96 97 98 99 100 101 102 103 104 105 106 107 108 109 110 111 |
#define BLYNK_PRINT Serial #include <ESP8266WiFi.h> #include <BlynkSimpleEsp8266.h> #define ENA D0 #define IN1 D1 #define IN2 D2 #define IN3 D3 #define IN4 D4 #define ENB D5 bool forward = 0; bool backward = 0; bool left = 0; bool right = 0; int Speed; char auth[] = "OaAek11MGCAZQwBTyr1lPNLsHhyrG8"; char ssid[] = "Prateek"; char pass[] = "12345"; void setup() { Serial.begin(9600); pinMode(ENA, OUTPUT); pinMode(IN1, OUTPUT); pinMode(IN2, OUTPUT); pinMode(IN3, OUTPUT); pinMode(IN4, OUTPUT); pinMode(ENB, OUTPUT); Blynk.begin(auth, ssid, pass, "blynk.cloud", 80); } BLYNK_WRITE(V0) { forward = param.asInt(); } BLYNK_WRITE(V1) { backward = param.asInt(); } BLYNK_WRITE(V2) { left = param.asInt(); } BLYNK_WRITE(V3) { right = param.asInt(); } BLYNK_WRITE(V5) { Speed = param.asInt(); } void smartcar() { if (forward == 1) { carforward(); Serial.println("carforward"); } else if (backward == 1) { carbackward(); Serial.println("carbackward"); } else if (left == 1) { carturnleft(); Serial.println("carfleft"); } else if (right == 1) { carturnright(); Serial.println("carright"); } else if (forward == 0 && backward == 0 && left == 0 && right == 0) { carStop(); Serial.println("carstop"); } } void loop() { Blynk.run(); smartcar(); } void carforward() { analogWrite(ENA, Speed); analogWrite(ENB, Speed); digitalWrite(IN1, LOW); digitalWrite(IN2, HIGH); digitalWrite(IN3, HIGH); digitalWrite(IN4, LOW); } void carbackward() { analogWrite(ENA, Speed); analogWrite(ENB, Speed); digitalWrite(IN1, HIGH); digitalWrite(IN2, LOW); digitalWrite(IN3, LOW); digitalWrite(IN4, HIGH); } void carturnleft() { analogWrite(ENA, Speed); analogWrite(ENB, Speed); digitalWrite(IN1, HIGH); digitalWrite(IN2, LOW); digitalWrite(IN3, HIGH); digitalWrite(IN4, LOW); } void carturnright() { analogWrite(ENA, Speed); analogWrite(ENB, Speed); digitalWrite(IN1, LOW); digitalWrite(IN2, HIGH); digitalWrite(IN3, LOW); digitalWrite(IN4, HIGH); } void carStop() { digitalWrite(IN1, LOW); digitalWrite(IN2, LOW); digitalWrite(IN3, LOW); digitalWrite(IN4, LOW); } |
Code2
|
1 2 3 4 5 6 7 8 9 10 11 12 13 14 15 16 17 18 19 20 21 22 23 24 25 26 27 28 29 30 31 32 33 34 35 36 37 38 39 40 41 42 43 44 45 46 47 48 49 50 51 52 53 54 55 56 57 58 59 60 61 62 63 64 65 66 67 68 69 70 71 72 73 74 75 76 77 78 79 80 81 82 83 84 85 86 87 88 89 90 91 92 93 94 95 96 97 98 99 100 101 102 103 104 105 106 107 108 109 110 111 112 113 114 115 116 117 118 119 120 121 122 123 124 125 126 127 128 129 130 131 132 133 134 135 136 137 138 139 140 141 142 143 144 145 146 147 148 149 150 151 152 153 154 155 156 157 158 159 160 161 162 163 164 165 166 167 168 169 170 171 172 173 174 175 176 177 178 179 180 181 182 183 184 185 186 187 188 189 190 191 192 193 194 195 196 197 198 199 200 201 202 203 204 205 206 207 208 209 210 |
//Prateek //www.justdoelectronics.com //https://www.youtube.com/@JustDoElectronics #include <SoftwareSerial.h> #include "SoftwareSerial.h" #include "DFRobotDFPlayerMini.h" SoftwareSerial mySoftwareSerial(2, 3); DFRobotDFPlayerMini myDFPlayer; void printDetail(uint8_t type, int value); #define PAUSETIME 20000 #include <LiquidCrystal_I2C.h> LiquidCrystal_I2C lcd(0x27, 16, 2); SoftwareSerial sim800l(6, 7); #define button1 8 #define button2 9 #define button3 10 #define button4 11 #define button5 12 bool button_State; bool button_State1; bool button_State2; bool button_State3; bool button_State4; void setup() { mySoftwareSerial.begin(9600); Serial.begin(115200); //Prateek //www.justdoelectronics.com //https://www.youtube.com/@JustDoElectronics Serial.println(); Serial.println(F("Initializing DFPlayer...")); if (!myDFPlayer.begin(mySoftwareSerial)) { Serial.println(F("Unable to begin:")); Serial.println(F("1.Please recheck the connection!")); Serial.println(F("2.Please insert the SD card!")); while (true) ; } Serial.println(F("DFPlayer Mini online.")); myDFPlayer.volume(30); lcd.init(); lcd.backlight(); lcd.setCursor(0, 0); lcd.print(" Welcome To"); lcd.setCursor(0, 1); lcd.print(" Our Projects"); delay(2000); lcd.clear(); pinMode(button1, INPUT_PULLUP); pinMode(button2, INPUT_PULLUP); pinMode(button3, INPUT_PULLUP); pinMode(button4, INPUT_PULLUP); pinMode(button5, INPUT_PULLUP); sim800l.begin(9600); Serial.begin(9600); delay(1000); } void loop() { button_State = digitalRead(button1); button_State1 = digitalRead(button2); button_State2 = digitalRead(button3); button_State3 = digitalRead(button4); button_State4 = digitalRead(button5); //Prateek //www.justdoelectronics.com //https://www.youtube.com/@JustDoElectronics if (button_State == LOW) { Serial.println("Button pressed"); delay(200); lcd.setCursor(0, 0); lcd.print("Give Me Food...."); SendSMS(); myDFPlayer.play(1); } if (button_State1 == LOW) { Serial.println("Button pressed"); delay(200); lcd.setCursor(0, 0); lcd.print("Give me Drink..."); SendSMS1(); myDFPlayer.play(3); } if (button_State2 == LOW) { Serial.println("Button pressed"); delay(200); lcd.setCursor(0, 0); lcd.print("Give Me Medicine"); SendSMS2(); myDFPlayer.play(5); } if (button_State3 == LOW) { Serial.println("Button pressed"); delay(200); lcd.setCursor(0, 0); lcd.print("Give Me Dinner.."); SendSMS3(); myDFPlayer.play(7); } if (button_State4 == LOW) { Serial.println("Button pressed"); lcd.setCursor(0, 0); lcd.print("Wheelchair Damage..."); delay(200); SendSMS4(); myDFPlayer.play(4); } if (sim800l.available()) { Serial.write(sim800l.read()); } } void SendSMS() { Serial.println("Sending SMS..."); sim800l.print("AT+CMGF=1\r"); delay(100); //Prateek //www.justdoelectronics.com //https://www.youtube.com/@JustDoElectronics sim800l.print("AT+CMGS=\"xxxxxxxxxx\"\r"); delay(500); sim800l.print(" Give Me Food.."); delay(500); sim800l.print((char)26); delay(500); sim800l.println(); Serial.println(" Give Me Food.."); delay(500); } void SendSMS1() { Serial.println("Sending SMS..."); sim800l.print("AT+CMGF=1\r"); delay(100); //Prateek //www.justdoelectronics.com //https://www.youtube.com/@JustDoElectronics sim800l.print("AT+CMGS=\"xxxxxxxxxx\"\r"); delay(500); sim800l.print(" Give Me Water..."); delay(500); sim800l.print((char)26); delay(500); sim800l.println(); Serial.println(" Give Me water..."); delay(500); } void SendSMS2() { Serial.println("Sending SMS..."); sim800l.print("AT+CMGF=1\r"); delay(100); //Prateek //www.justdoelectronics.com //https://www.youtube.com/@JustDoElectronics sim800l.print("AT+CMGS=\"xxxxxxxxxx\"\r"); delay(500); sim800l.print("Give Me Medicine"); delay(500); sim800l.print((char)26); delay(500); sim800l.println(); Serial.println(" Give Me Medicine"); delay(500); } void SendSMS3() { Serial.println("Sending SMS..."); sim800l.print("AT+CMGF=1\r"); delay(100); //Prateek //www.justdoelectronics.com //https://www.youtube.com/@JustDoElectronics sim800l.print("AT+CMGS=\"xxxxxxxxxx\"\r"); delay(500); sim800l.print(" Give Me Dinner.."); delay(500); sim800l.print((char)26); delay(500); sim800l.println(); Serial.println(" Give Me Dinner.."); delay(500); } void SendSMS4() { Serial.println("Sending SMS..."); sim800l.print("AT+CMGF=1\r"); delay(100); //Prateek //www.justdoelectronics.com //https://www.youtube.com/@JustDoElectronics sim800l.print("AT+CMGS=\"+91xxxxxxxxxx\"\r"); delay(500); sim800l.print("Plz Check Wheelchair Damage"); delay(500); sim800l.print((char)26); delay(500); sim800l.println(); Serial.println("Plz Check Whelchair Damage"); delay(500); } |
Project Demo
We will show the output of the project you just check the images. We will upload the step-by-step image.
Video Tutorial
Conclusion
This Wheelchair is very useful for paralyzed people who fill the communication gap between patients, relatives, and doctors. they can move around easily and any person can operate very easily.

