Introduction
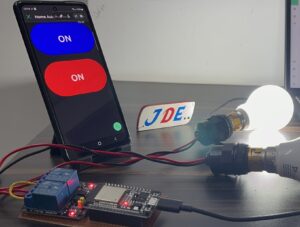
In this Article, We Try To Build An ESP32-based Home Automation With the new Blynk App.We control the home application LIke TV,FAN,LIGHT,ETC with the mobile app and Blynk webserver.
Bill Of Material
S.N | Component's | Quantity | Link To Buy |
1 | ESP32 Board | 1 | |
2 | 2 Channel Relay Module | 1 | |
3 | Power Source | 1 |
Component’s Overview
ESP32 Board
- The ESP32 Board Is Integrated with Wi-Fi And Dual-Core, Low Power Bluetooth, Low Power Consumption, and High performance.
- ESP32 Is a small board With many pins available To Connect to the input and output Devices.
- Compared to the Esp8266 Board, so many Analog pins are Available On the ESP32 Board and it Takes Low Power.
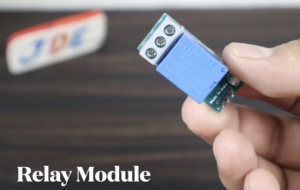
Relay Module
2 Channel Module is Used A wide range such as Arduino,PIC,Raspberry.
1 Channel Relay Module But In This Project I Used 2 Channel Module
Features
- Operating Voltage: 5V
- Max Current : 20mA
- Relay Contact Current Capacity at AC250V: 10A
- Relay Contact Current Capacity at DC5V: 10A
Circuit Diagram
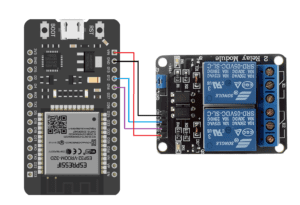
In this Circuit Diagram We conected the 2 channel moduel to Pin Number D12 & D14 on ESP32 Board.
Blynk App Setup
Create The Template
Now, We select the Switch, edit the names LIGHT1 & LIGHT2, and select the Virtual Pin V0 & V1.
Now App will be ready then copy the token ID and paste a Code.
Code
|
1 2 3 4 5 6 7 8 9 10 11 12 13 14 15 16 17 18 19 20 21 22 23 24 25 26 27 28 29 30 31 32 33 34 35 36 37 38 39 40 41 42 43 44 45 46 |
//Prateek //www.justdoelectronics.com #include <Wire.h> #include <WiFiClient.h> #include <BlynkSimpleEsp32.h> #define relay1 12 #define relay2 14 #define BLYNK_AUTH_TOKEN "CPVKnwibTsr7rBTxIJZ3xbmNfE_6R4hd" char auth[] = BLYNK_AUTH_TOKEN; char ssid[] = "justdoelectronics"; char pass[] = "JDE"; BLYNK_WRITE(V0) { bool value1 = param.asInt(); if (value1 == 1) { digitalWrite(relay1, LOW); } else { digitalWrite(relay1, HIGH); } } BLYNK_WRITE(V1) { bool value2 = param.asInt(); if (value2 == 1) { digitalWrite(relay2, LOW); } else { digitalWrite(relay2, HIGH); } } void setup() { pinMode(relay1, OUTPUT); pinMode(relay2, OUTPUT); digitalWrite(relay1, HIGH); digitalWrite(relay2, HIGH); Blynk.begin(auth, ssid, pass, "blynk.cloud", 80); } void loop() { Blynk.run(); } |
Project Explanation
Now the System will Power Up and Reday to used the projects.the webserver and mobile app also conected to the ESP32 Board.
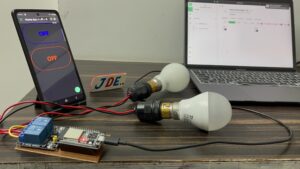
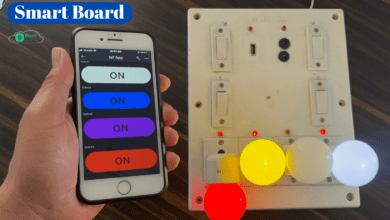
When we click the On/Off Button then AC Blub will turn On/off.
Now the Both Switch Will On And Is display on Conduction in Blynk Mobile App As Well As Webserver.
