
Sign Language to Text Conversion Using Flex Sensor
Sign Language to Text Conversion Using Flex Sensor & Arduino
Introduction
In this article, I explain how I made an Arduino-based Sign Language to Text Conversion project to help Deaf people. Sign language is a natural way of communication between normal and dumb people. Sign language is mostly dependent on hand gesture recognition.
It is sometimes not easy for normal people to recognize the signs properly and understand what they want to say. The intention of the gloves is to make the lifestyle of the dumb and deaf people easy.
Each flex sensor is supplied with the initial voltage as per the movement of the fingers there will be a voltage drop because of the change in the resistance due to the bending of the flex sensor on the fingers.
That voltage we set the threshold value in the code when you band the Flex sensor and cross the threshold value the set text will display in the 16×2 Lcd display and Bluetooth App.
Sign Language To Speech Conversion Project
Bill of Materials
If you try to make it self then buy these components.
S.N | Component's | Quantity | Link To Buy |
1 | Arduino UNO | 1 | |
2 | Blutooth module(HC-05) | 1 | |
3 | 16x2 LCD Display (I2C) | 1 | |
4 | Flex Sensor | 3 | |
5 | 10k resister | 3 | |
6 | USB Cable | 1 |
Component Overview
Arduino UNO is an open-source Embedded Development board based on Atmega328 DIP Package Microcontroller.
The 16×2 LCD Display is a basic 16-character by 2-line Alphanumeric display. White text on Blue background. Utilizes the extremely common HD44780 parallel interface chipset.
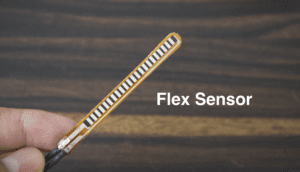
A flex sensor is a resistive device that changes its resistance based on the amount of bending or flexing applied. It is usually made of a flexible material, such as a thin film or plastic, embedded with conductive material. As the sensor bends, the conductive material’s path changes, altering the resistance of the sensor.
- Flex Sensor is used in various fields, like control Robot, Control Home Applications, and speech conversion.
- Flex Sensor Has Two leads you see in the image and acts like a variable Resister.
- The Flex Sensor Output of resistance changes In two pins, when the voltage changes across the leads the resistance will change.
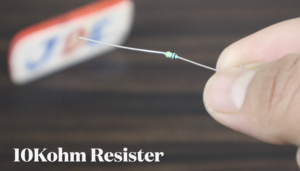
This One is 10kohm Resister
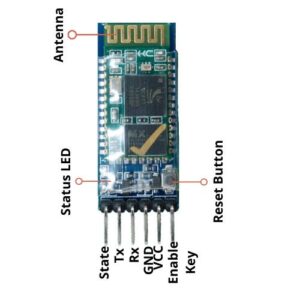
If you try To set Wireless Serial Communication, the HC-05 Bluetooth Module is the most demanding and popular due to its low price and extremely high features.
Is Work On UART Protocol required Only Four Wire VCC, Tx, Rx and GND.
Circuit Diagram
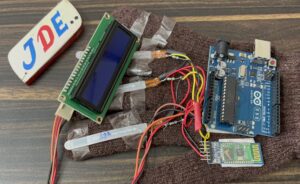
Here we design the Proper circuit Diagram and interface the all sensors and modules.
- The Three Flex Sensor interfaces the Analog Pin A1, A2 And A3 with Arduino Uno Board.
- 16×2 LCD Display works I2C Protocol & is conected SCL Pin To A5, SDA Pin To A4, VCC Pin to 5v And GND Pin to GND.
- The last one is HC-05 Blutooth Module work UART Protocol & is Conected VCC to 5V, Tx To D2, Rx To D3 And GND To GND.
Code
Before you upload the code is required to Install the Library liquid crystal library.
|
1 2 3 4 5 6 7 8 9 10 11 12 13 14 15 16 17 18 19 20 21 22 23 24 25 26 27 28 29 30 31 32 33 34 35 36 37 38 39 40 41 42 43 44 45 46 47 48 49 50 51 52 53 54 55 56 57 58 59 60 61 62 63 64 65 66 67 68 69 70 71 72 73 74 75 76 77 78 79 80 81 82 83 84 85 86 87 88 89 90 91 92 93 94 95 96 97 98 99 100 101 102 103 104 105 106 107 108 109 110 111 112 113 114 115 116 117 118 119 120 121 122 123 124 125 126 |
//Prateek //wwww.prateeks.in //www.justdoelectronics.com //https://www.youtube.com/c/JustDoElectronics/videos #include "SoftwareSerial.h" #include <LiquidCrystal_I2C.h> #include <SoftwareSerial.h> SoftwareSerial mySerial(3, 2); LiquidCrystal_I2C lcd(0x27, 16, 2); #define blue 2 #define green 3 #define red 4 unsigned int f; unsigned int g; unsigned int h; void setup() { pinMode(blue, OUTPUT); pinMode(green, OUTPUT); pinMode(red, OUTPUT); Serial.begin(9600); mySerial.begin(9600); Serial.println(); lcd.init(); lcd.backlight(); lcd.setCursor(0, 0); lcd.print(" Welcome To"); lcd.setCursor(0, 1); lcd.print("JustDoElectronic"); lcd.clear(); delay(3000); } void loop() { f = analogRead(1); g = analogRead(2); h = analogRead(3); //Prateek //wwww.prateeks.in //www.justdoelectronics.com //https://www.youtube.com/c/JustDoElectronics/videos // Serial.print("f reading"); // Serial.println(f); // Serial.print("g reading"); // Serial.println(g); // Serial.print("h reading"); // Serial.println(h); if (f <= 722) { digitalWrite(blue, HIGH); digitalWrite(green, LOW); digitalWrite(red, LOW); mySerial.println("Plz Give Me Water"); lcd.clear(); lcd.setCursor(0, 0); lcd.print(" Plz Give Me"); lcd.setCursor(0, 1); lcd.print(" Water "); delay(3000); lcd.clear(); lcd.setCursor(0, 0); lcd.print(" If Anything"); lcd.setCursor(0, 1); lcd.print(" You Want "); } else if (g <= 670) { //Prateek //wwww.prateeks.in //www.justdoelectronics.com //https://www.youtube.com/c/JustDoElectronics/videos digitalWrite(green, HIGH); digitalWrite(blue, LOW); digitalWrite(red, LOW); mySerial.println("Plz Give Me Food"); lcd.clear(); lcd.setCursor(0, 0); lcd.print(" Plz Give Me "); lcd.setCursor(0, 1); lcd.print(" Food "); delay(3000); lcd.clear(); lcd.setCursor(0, 0); lcd.print(" If Anything"); lcd.setCursor(0, 1); lcd.print(" You Want "); } else if (h <= 675) { digitalWrite(green, HIGH); digitalWrite(blue, LOW); digitalWrite(red, LOW); mySerial.println("Plz Give Me Tea"); lcd.clear(); lcd.setCursor(0, 0); lcd.print(" Plz Give Me"); lcd.setCursor(0, 1); lcd.print(" Tea "); delay(3000); lcd.clear(); lcd.setCursor(0, 0); lcd.print(" If Anything"); lcd.setCursor(0, 1); lcd.print(" You Want "); //Prateek //wwww.prateeks.in //www.justdoelectronics.com //https://www.youtube.com/c/JustDoElectronics/videos } else { } delay(200); } |
Project Demo
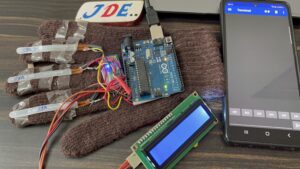
- Now first we connect the Arduino Uno board to the USB cable And attach it to the Laptop.
Then Go to the blutooth option and connect the HC-05 Blutooth module.
The project and app will be ready to use it.
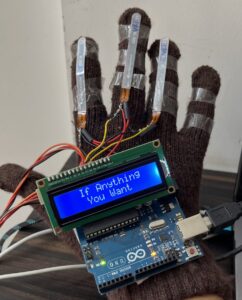
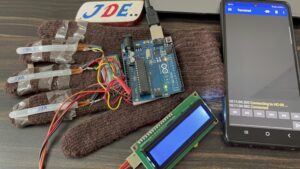
Now we Band the first flex sensor and then Display the “Plz Give Me Tea” Message in a 16×2 LCD display & Bluetooth Module.
when we band the second flex sensor the “Plz Give Me Food” Message will Display
when we band the Third flex sensor the “Plz Give Me Water” Message will Display.
If we do not band any Flex sensor then not Display Any message.
Video Tutorial
Conclusion
In this project, we designed the Sign Language to Text Conversion With Arduino & Blutooth Module. and is working fine but there is no voice I mean it always sees the Mobile App. that’s why we decided in future we begin again the same project with Voice Module.
Sign Language To Speech Conversion







One Comment